

Manual for downloading maps for Map2X from Google Maps

Tutorial for making maps for Map2X from Google Maps server. Tutorial is valid for application version 0.0.6. Due to not yet decoded format of satellite maps only basic and terrain map is supported.
Downloading Google maps is at this time non-functional due to changes on the server. Problem will be fixed in next release of Map2X, not sooner.
Warning: Tutorial works only with Map2X version 0.0.6, it's useless for newer versions, if you have an older version, update.
Step one: select area and map type
The very first thing for succesful map creation is defining area, which you want to use. View map in browser and zoom in order to make selected area take most space of the screen, you can then easier select area borders..
For purposes of this manual I select southern side of England - see picture, area is highlighted (click for enlarge).
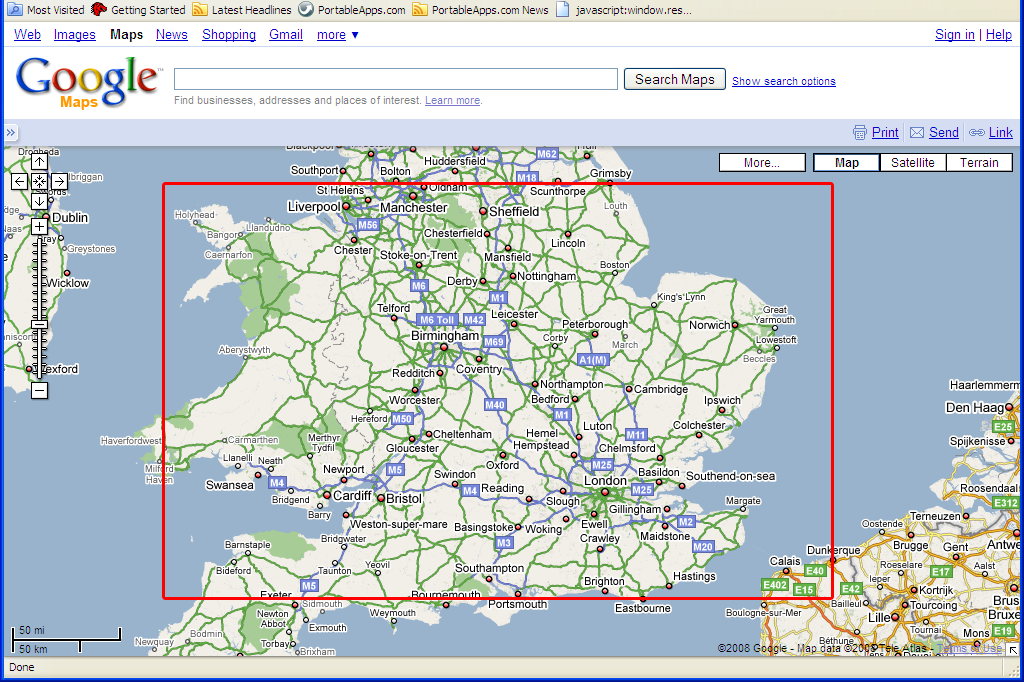
You have on Google Maps choice from three map types, but I have not yet decoded format of satellite maps so you have only two map types at your disposal - basic and terrain map. Satellite maps can be overlayed with names of towns and streets, this map type is at your disposal too, but is useless without satellite maps.
Switch to map type of your choice, we'll need it further.
Step two: determining coordinates of the area
We're now at the most difficult part of the operation - we need to get coords of map tiles (pictures, of hich is map made) covering the area. We can use any internet browser for determining the coordinates, e.g. Firefox. Select item Page Info from Firefox Tools toolbar and under Media item is list of all images.
Map tiles have this form of adress:
http://mt0.google.com/mt/v=w2.80&hl=en&x=64&y=42&zoom=10&s=Ga
Address look little unclear at first sight, but there's some unneccessary parts for us. Now we analyze part of the address after the last slash:
- v=w2.80 indicates map version, according to this can map types be differentiated. Number is unneccessary because it's pernamently changed, only alphabet characters are important:
- Form w2.80 is at basic map type
- Form w2p.80 is at terrain map, important part is the 'p' character
- Form w2t.80 indicates overlay of satellite map, type is identified by a 't' character
- hl=cs represents language, not important for us (maps are not localized)
- x=64, y=42 are coordinates of this map tile
- zoom=10 indicates zoom
- s=Ga makes no sense (here appears various part of Galielo string)
Now we can start looking for the tiles. First we need to determine coordinates of upper left tile inside selected area. For the illustration example is that this tile:
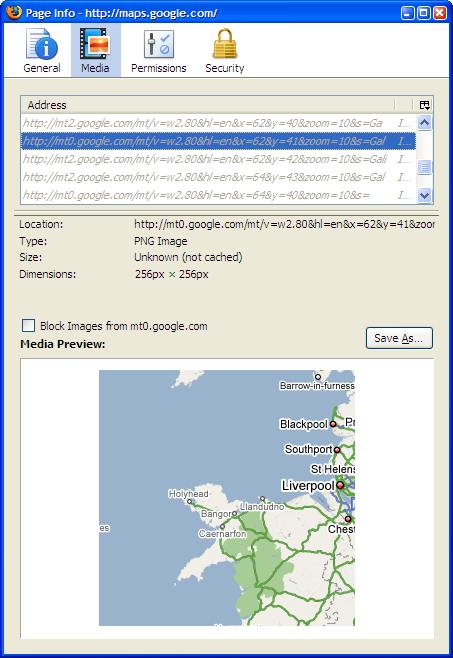
In most cases you don't find a tile what is exactly in the corner of the area, always will be a little bit exceeded. From the address remember
Now we need to get coordinates lowe right tile, which lies outside the area. Everything, that's on this tile will not be on the map, so choose carefully. For illustration example is that this tile:
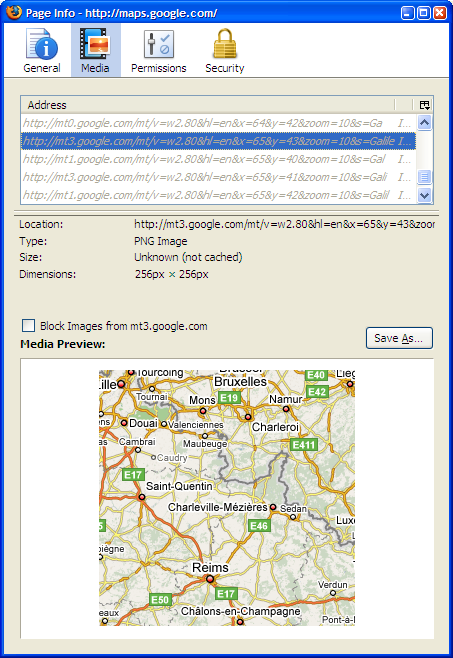
For correctness the tile must have the same version and zoom like previous (here w2.80 and 10), remember its coordinates (here 65 and 43, we'll use them in next step.
Step three: creating a map.conf file
Now we have discovered enough to create a file which describes the map package.
You can create file map.conf in some sort of text editor supporting saving in UTF-8, for example Notepad on Windows. Here comes the configuration file for our illustration example:
# Southern England (4 zoom levels, 2 map types)
caption="Southern England"

# Map server
api=google

# Whether is map packed
packed=false

# Chosen map types
type=w2.80
type=w2p.81

# Beginning coordinates (up left)
begin_x=62
begin_y=41

# Ending coordinates
end_x=65
end_y=43

# All available zooms
zoom=10
zoom=9
zoom=8
zoom=7

# Beginning zoom
zoom_actual=10

# beginning position and move (choosed by application)
pos_x=0
pos_y=0
move_x=160
move_y=120
Lines beginning with an # (you can write also semicolon ;) are comments - here you can write whatever you want. Blank lines should be anywhere. More-word values enclose into quotes. Parameters are commented, I describe them for better understanding:
- caption - description of the package. Shows in the menu. Enclose into quotes.
- api - indicates that the map is from Google
- packed - map is not yet packed, leave false. Packing utility will change this value itself.
- type - chosen map types. Here pay attention for right copying the value from address of the tile. You can see in example file that terrain map can have different version number than basic map. Detect the version at every map type again. If not-existing version is written, given map type cannot be downloaded.
- overlay - this parameter is not in the example file, but here you can (like at the type parameter) set map overlay. Google have an overlay for town and street names for satellite maps (see above).
- begin_x, begin_y - beginning coordinates, which have we obtained from address of the first tile
- end_x, end_y - ending coordinates (from address of the second tile)
- zoom - all available zooms, which you want to have in your map. Google has "reversed" numbering - zoom with number 0 is the most detailed and on the zoom 16 whole world can be seen at the moment.
- zoom_actual - beginning zoom when loading the map, enter zoom from address of the two tiles
- pos_x, pos_y, move_x, move_y - beginning position and move when loading the map. Leave the same values like in the example, Map2X will overwrite them when a position is saved.
After creating, save the file with name map.conf with UTF-8 encoding.
Step four: downloading and packing the map
Proceed with manual for map packing and downloading utility.
Step five: done!
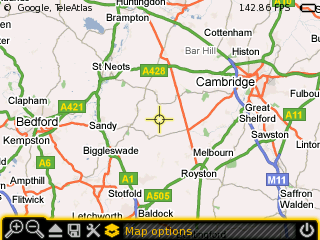
Map package from Google is done. You can select it from the menu after launching the application.
If you have problems with creating the package, or the application doesn't want to load it, ask me.
Related artciles
Under tag .
» Add commentDiscussion: 0 comments
No comments yet.