Model Viewer
Scene graph, resource management and model importing.
This example shows how to load a 3D scene file provided via a command line argument, import the scene hierarchy, meshes, materials and textures and populate a SceneGraph with it.
Note that this example is deliberately simplified to highlight the above features. For a full-featured model viewer and animation player see the magnum-player app.
Scene graph
In previous examples we managed our scene manually, because there was just one object. However, as scenes grow more complex, it's better to have them organized somehow. Magnum SceneGraph takes care of three key things:
- parent/child object relations
- hierarchic object transformations
- attaching features to objects (drawing, animation, ...)
For a scene there is one root SceneGraph::
Each particular scene graph uses some transformation implementation, which stores transformation for each object (relative to parent) and provides convenience functions for most used transformations, like translation, rotation and scaling. It is also possible to calculate an absolute transformation or transformation relative to some arbitrary object in the same scene.
Features* are added to objects to make them do something useful. The most common feature, which will be also used in this example, is SceneGraph::
Magnum scene graph implementation works for both 2D and 3D scenes. Their usage is nearly the same and differs only in obvious ways (e.g. perspective projection is not available in 2D).
See also Using the scene graph for more detailed introduction.
Setting up and initializing the scene graph
As we are importing a complete scene, we need quite a lot of things to handle materials, meshes and textures:
#include <Corrade/Containers/Array.h>
#include <Corrade/Containers/Optional.h>
#include <Corrade/Containers/Pair.h>
#include <Corrade/PluginManager/Manager.h>
#include <Corrade/Utility/Arguments.h>
#include <Corrade/Utility/DebugStl.h>
#include <Magnum/ImageView.h>
#include <Magnum/Mesh.h>
#include <Magnum/PixelFormat.h>
#include <Magnum/GL/DefaultFramebuffer.h>
#include <Magnum/GL/Mesh.h>
#include <Magnum/GL/Renderer.h>
#include <Magnum/GL/Texture.h>
#include <Magnum/GL/TextureFormat.h>
#include <Magnum/Math/Color.h>
#include <Magnum/MeshTools/Compile.h>
#include <Magnum/Platform/Sdl2Application.h>
#include <Magnum/SceneGraph/Camera.h>
#include <Magnum/SceneGraph/Drawable.h>
#include <Magnum/SceneGraph/MatrixTransformation3D.h>
#include <Magnum/SceneGraph/Scene.h>
#include <Magnum/Shaders/PhongGL.h>
#include <Magnum/Trade/AbstractImporter.h>
#include <Magnum/Trade/ImageData.h>
#include <Magnum/Trade/MeshData.h>
#include <Magnum/Trade/PhongMaterialData.h>
#include <Magnum/Trade/SceneData.h>
#include <Magnum/Trade/TextureData.h>
For this example we will use scene graph with SceneGraph::
typedef SceneGraph::Object<SceneGraph::MatrixTransformation3D> Object3D;
typedef SceneGraph::Scene<SceneGraph::MatrixTransformation3D> Scene3D;
Our main class stores shader instances for rendering colored and textured objects and all imported meshes and textures. After that, there is the scene graph — root scene instance, a manipulator object for easy interaction with the scene, object holding the camera, the actual camera feature instance and a group of all drawables in the scene.
class ViewerExample: public Platform::Application {
    public:
        explicit ViewerExample(const Arguments& arguments);

    private:
        void drawEvent() override;
        void viewportEvent(ViewportEvent& event) override;
        void mousePressEvent(MouseEvent& event) override;
        void mouseReleaseEvent(MouseEvent& event) override;
        void mouseMoveEvent(MouseMoveEvent& event) override;
        void mouseScrollEvent(MouseScrollEvent& event) override;

        Vector3 positionOnSphere(const Vector2i& position) const;

        Shaders::PhongGL _coloredShader;
        Shaders::PhongGL _texturedShader{Shaders::PhongGL::Configuration{}
            .setFlags(Shaders::PhongGL::Flag::DiffuseTexture)};
        Containers::Array<Containers::Optional<GL::Mesh>> _meshes;
        Containers::Array<Containers::Optional<GL::Texture2D>> _textures;

        Scene3D _scene;
        Object3D _manipulator, _cameraObject;
        SceneGraph::Camera3D* _camera;
        SceneGraph::DrawableGroup3D _drawables;
        Vector3 _previousPosition;
};
In the constructor we first parse command-line arguments using Utility::--magnum- and addSkippedPrefix() lets them get propagated to the engine without the application failing due to an unrecognized argument name.
ViewerExample::ViewerExample(const Arguments& arguments):
    Platform::Application{arguments, Configuration{}
        .setTitle("Magnum Viewer Example")
        .setWindowFlags(Configuration::WindowFlag::Resizable)}
{
    Utility::Arguments args;
    args.addArgument("file").setHelp("file", "file to load")
        .addOption("importer", "AnySceneImporter")
            .setHelp("importer", "importer plugin to use")
        .addSkippedPrefix("magnum", "engine-specific options")
        .setGlobalHelp("Displays a 3D scene file provided on command line.")
        .parse(arguments.argc, arguments.argv);
Then we setup the scene:
    _cameraObject
        .setParent(&_scene)
        .translate(Vector3::zAxis(5.0f));
    (*(_camera = new SceneGraph::Camera3D{_cameraObject}))
        .setAspectRatioPolicy(SceneGraph::AspectRatioPolicy::Extend)
        .setProjectionMatrix(
            Matrix4::perspectiveProjection(35.0_degf, 1.0f, 0.01f, 1000.0f)
        )
        .setViewport(GL::defaultFramebuffer.viewport().size());

    _manipulator.setParent(&_scene);
After that, we enable depth test and face culling for correct and fast rendering and set some shader defaults that will stay the same during the whole time. Note that these properties are usually part of the imported material data, but to keep the example simple we'll be only using the diffuse color and texture properties.
    GL::Renderer::enable(GL::Renderer::Feature::DepthTest);
    GL::Renderer::enable(GL::Renderer::Feature::FaceCulling);
    _coloredShader
        .setAmbientColor(0x111111_rgbf)
        .setSpecularColor(0xffffff_rgbf)
        .setShininess(80.0f);
    _texturedShader
        .setAmbientColor(0x111111_rgbf)
        .setSpecularColor(0x111111_rgbf)
        .setShininess(80.0f);
Importing the data
For scene import we are using the AnySceneImporter plugin, which detects format based or file extension and then redirects the actual loading to a plugin dedicated for given format. So, for example, if you open mesh.obj, it'll be opened using ObjImporter, if you open mesh.ply, it'll go to StanfordImporter, etc. Sometimes there is more than one possible choice (glTF files in particular can be opened using CgltfImporter, TinyGltfImporter or AssimpImporter) and so above we made it possible to override the used importer plugin using the --importer command-line argument. Another option is to specify the preference using PluginManager::
We try load and instantiate the plugin and open the file, which isn't any different from when we dealt with just images in the Textured Quad example:
    PluginManager::Manager<Trade::AbstractImporter> manager;
    Containers::Pointer<Trade::AbstractImporter> importer =
        manager.loadAndInstantiate(args.value("importer"));

    if(!importer || !importer->openFile(args.value("file")))
        std::exit(1);
Importing textures
First we import textures, if there are any. The textures are stored in an array of Containers::
    _textures = Containers::Array<Containers::Optional<GL::Texture2D>>{
        importer->textureCount()};
    for(UnsignedInt i = 0; i != importer->textureCount(); ++i) {
        Containers::Optional<Trade::TextureData> textureData =
            importer->texture(i);
        if(!textureData || textureData->type() != Trade::TextureType::Texture2D) {
            Warning{} << "Cannot load texture" << i
                << importer->textureName(i);
            continue;
        }

        Containers::Optional<Trade::ImageData2D> imageData =
            importer->image2D(textureData->image());
        if(!imageData || !imageData->isCompressed()) {
            Warning{} << "Cannot load image" << textureData->image()
                << importer->image2DName(textureData->image());
            continue;
        }

        (*(_textures[i] = GL::Texture2D{}))
            .setMagnificationFilter(textureData->magnificationFilter())
            .setMinificationFilter(textureData->minificationFilter(),
                                   textureData->mipmapFilter())
            .setWrapping(textureData->wrapping().xy())
            .setStorage(Math::log2(imageData->size().max()) + 1,
                GL::textureFormat(imageData->format()), imageData->size())
            .setSubImage(0, {}, *imageData)
            .generateMipmap();
    }
Note that the scene importer transparently deals with image loading for us, be it images embedded directly in the file or referenced externally. For flexibility, scene importers internally use AnyImageImporter. It is like the AnySceneImporter we used, but for images. For example if the scene references image.png, it gets opened through PngImporter, texture.jpg through JpegImporter etc. The plugins can also alias each other, so for example on platforms that don't have libPNG available, dependency-less StbImageImporter can be transparently used in place of PngImporter without changing anything in the application code. The ultimate goal is that you can deploy a different set of plugins for each platform but still use them in a platform-independent way, without having complex logic for which plugins to use on which system.
Importing materials
After that we import all materials. The material data are stored only temporarily, because we'll later extract only the data we need from them. For simplicity, we'll treat each material as if it was Phong by turning it into Trade::
    Containers::Array<Containers::Optional<Trade::PhongMaterialData>> materials{
        importer->materialCount()};
    for(UnsignedInt i = 0; i != importer->materialCount(); ++i) {
        Containers::Optional<Trade::MaterialData> materialData;
        if(!(materialData = importer->material(i))) {
            Warning{} << "Cannot load material" << i
                << importer->materialName(i);
            continue;
        }

        materials[i] = std::move(*materialData).as<Trade::PhongMaterialData>();
    }
Importing meshes
Next thing is loading meshes. This is easy to do with MeshTools::
    _meshes = Containers::Array<Containers::Optional<GL::Mesh>>{
        importer->meshCount()};
    for(UnsignedInt i = 0; i != importer->meshCount(); ++i) {
        Containers::Optional<Trade::MeshData> meshData;
        if(!(meshData = importer->mesh(i))) {
            Warning{} << "Cannot load mesh" << i << importer->meshName(i);
            continue;
        }

        MeshTools::CompileFlags flags;
        if(!meshData->hasAttribute(Trade::MeshAttribute::Normal))
            flags |= MeshTools::CompileFlag::GenerateFlatNormals;
        _meshes[i] = MeshTools::compile(*meshData, flags);
    }
Importing the scene
Last remaining part is to populate the actual scene. First we take care of an edge case where a file doesn't have any scene (which is always the case for PLY or STL files) — we'll just load the first mesh, if it's there, and slap a default material on it:
    if(importer->defaultScene() == -1) {
        if(!_meshes.isEmpty() && _meshes[0])
            new ColoredDrawable{_manipulator, _coloredShader, *_meshes[0],
                0xffffff_rgbf, _drawables};
        return;
    }
Simply put, Trade::
    Containers::Optional<Trade::SceneData> scene;
    if(!(scene = importer->scene(importer->defaultScene())) ||
       !scene->is3D() ||
       !scene->hasField(Trade::SceneField::Parent) ||
       !scene->hasField(Trade::SceneField::Mesh))
    {
        Fatal{} << "Cannot load scene" << importer->defaultScene()
            << importer->sceneName(importer->defaultScene());
    }
Similarly as with other data we've imported so far, objects in Trade::Object3D instances. Here however, not all objects in the mappingBound() may actually be present in the scene hierarchy, some might describe other structures or belong to other scenes, and so we instantiate only objects that have a Trade::
    Containers::Array<Object3D*> objects{std::size_t(scene->mappingBound())};
    Containers::Array<Containers::Pair<UnsignedInt, Int>> parents
        = scene->parentsAsArray();
    for(const Containers::Pair<UnsignedInt, Int>& parent: parents)
        objects[parent.first()] = new Object3D{};
Then we go through the parent field again and set the actual parent, or parent directly to the manipulator if it's a root object indicated with -1. We do this in a separate pass to ensure the parent object is already allocated by the time we pass it to SceneGraph::
    for(const Containers::Pair<UnsignedInt, Int>& parent: parents)
        objects[parent.first()]->setParent(parent.second() == -1 ?
            &_manipulator : objects[parent.second()]);
Next we assign transformations. Because we checked that the scene is 3D, it implies that there's a (3D) transformation field. It could be also represented as separate translation/rotation/scaling components, but we want just matrices and that's what transformations3DAsArray() will make for us. Note that we only consider objects that are part of the hierarchy we just created, ignoring fields referencing objects outside of it. It goes the other way as well — the transformation field doesn't have to be present for all objects in the hierarchy, objects not referenced by the it will retain the default identity transformation.
    for(const Containers::Pair<UnsignedInt, Matrix4>& transformation:
        scene->transformations3DAsArray())
    {
        if(Object3D* object = objects[transformation.first()])
            object->setTransformation(transformation.second());
    }
Finally, for objects that are a part of the hierarchy and have a mesh assigned, we add a drawable, either colored or textured depending on what's specified in its associated material. For simplicity, only diffuse texture is considered in this example. Here it can happen that a single object can have multiple meshes assigned — the SceneGraph supports that natively and it'll simply result in more than one drawable attached.
    for(const Containers::Pair<UnsignedInt, Containers::Pair<UnsignedInt, Int>>&
        meshMaterial: scene->meshesMaterialsAsArray())
    {
        Object3D* object = objects[meshMaterial.first()];
        Containers::Optional<GL::Mesh>& mesh =
            _meshes[meshMaterial.second().first()];
        if(!object || !mesh) continue;

        Int materialId = meshMaterial.second().second();

        /* Material not available / not loaded, use a default material */
        if(materialId == -1 || !materials[materialId]) {
            new ColoredDrawable{*object, _coloredShader, *mesh, 0xffffff_rgbf,
                _drawables};

        /* Textured material, if the texture loaded correctly */
        } else if(materials[materialId]->hasAttribute(
                Trade::MaterialAttribute::DiffuseTexture
            ) && _textures[materials[materialId]->diffuseTexture()])
        {
            new TexturedDrawable{*object, _texturedShader, *mesh,
                *_textures[materials[materialId]->diffuseTexture()],
                _drawables};

        /* Color-only material */
        } else {
            new ColoredDrawable{*object, _coloredShader, *mesh,
                materials[materialId]->diffuseColor(), _drawables};
        }
    }
}
Drawable objects
As explained above, all objects that want to draw something on the screen using the scene graph do that using the SceneGraph::
The subclass stores everything needed to render either the colored or the textured object — reference to a shader, a mesh and a color or a texture. The constructor takes care of passing the containing object and a drawable group to the superclass.
class ColoredDrawable: public SceneGraph::Drawable3D {
    public:
        explicit ColoredDrawable(Object3D& object, Shaders::PhongGL& shader, GL::Mesh& mesh, const Color4& color, SceneGraph::DrawableGroup3D& group): SceneGraph::Drawable3D{object, &group}, _shader(shader), _mesh(mesh), _color{color} {}

    private:
        void draw(const Matrix4& transformationMatrix, SceneGraph::Camera3D& camera) override;

        Shaders::PhongGL& _shader;
        GL::Mesh& _mesh;
        Color4 _color;
};

class TexturedDrawable: public SceneGraph::Drawable3D {
    public:
        explicit TexturedDrawable(Object3D& object, Shaders::PhongGL& shader, GL::Mesh& mesh, GL::Texture2D& texture, SceneGraph::DrawableGroup3D& group): SceneGraph::Drawable3D{object, &group}, _shader(shader), _mesh(mesh), _texture(texture) {}

    private:
        void draw(const Matrix4& transformationMatrix, SceneGraph::Camera3D& camera) override;

        Shaders::PhongGL& _shader;
        GL::Mesh& _mesh;
        GL::Texture2D& _texture;
};
Each drawable needs to implement the draw() function. It's nothing more than setting up shader parameters and drawing the mesh. To keep things simple, the example uses a fixed global light position — though it's possible to import the light position and other properties as well, if the file has them.
void ColoredDrawable::draw(const Matrix4& transformationMatrix, SceneGraph::Camera3D& camera) {
    _shader
        .setDiffuseColor(_color)
        .setLightPositions({
            {camera.cameraMatrix().transformPoint({-3.0f, 10.0f, 10.0f}), 0.0f}
        })
        .setTransformationMatrix(transformationMatrix)
        .setNormalMatrix(transformationMatrix.normalMatrix())
        .setProjectionMatrix(camera.projectionMatrix())
        .draw(_mesh);
}

void TexturedDrawable::draw(const Matrix4& transformationMatrix, SceneGraph::Camera3D& camera) {
    _shader
        .setLightPositions({
            {camera.cameraMatrix().transformPoint({-3.0f, 10.0f, 10.0f}), 0.0f}
        })
Finally, the draw event only delegates to the camera, which draws everything in our drawable group.
void ViewerExample::drawEvent() {
    GL::defaultFramebuffer.clear(GL::FramebufferClear::Color|GL::FramebufferClear::Depth);

    _camera->draw(_drawables);

    swapBuffers();
}
Event handling
This example has a resizable window, for which we need to implement the viewport event. It simply delegates the size change to GL viewport and to the camera.
void ViewerExample::viewportEvent(ViewportEvent& event) {
    GL::defaultFramebuffer.setViewport({{}, event.framebufferSize()});
    _camera->setViewport(event.windowSize());
}
Lastly there is mouse handling to rotate and zoom the scene around, nothing new to talk about.
void ViewerExample::mousePressEvent(MouseEvent& event) {
    if(event.button() == MouseEvent::Button::Left)
        _previousPosition = positionOnSphere(event.position());
}

void ViewerExample::mouseReleaseEvent(MouseEvent& event) {
    if(event.button() == MouseEvent::Button::Left)
        _previousPosition = Vector3();
}

void ViewerExample::mouseScrollEvent(MouseScrollEvent& event) {
    if(!event.offset().y()) return;

    /* Distance to origin */
    const Float distance = _cameraObject.transformation().translation().z();

    /* Move 15% of the distance back or forward */
    _cameraObject.translate(Vector3::zAxis(
        distance*(1.0f - (event.offset().y() > 0 ? 1/0.85f : 0.85f))));

    redraw();
}

Vector3 ViewerExample::positionOnSphere(const Vector2i& position) const {
    const Vector2 positionNormalized = Vector2{position}/Vector2{_camera->viewport()} - Vector2{0.5f};
    const Float length = positionNormalized.length();
    const Vector3 result(length > 1.0f ? Vector3(positionNormalized, 0.0f) : Vector3(positionNormalized, 1.0f - length));
    return (result*Vector3::yScale(-1.0f)).normalized();
}

void ViewerExample::mouseMoveEvent(MouseMoveEvent& event) {
    if(!(event.buttons() & MouseMoveEvent::Button::Left)) return;

    const Vector3 currentPosition = positionOnSphere(event.position());
    const Vector3 axis = Math::cross(_previousPosition, currentPosition);

    if(_previousPosition.length() < 0.001f || axis.length() < 0.001f) return;

    _manipulator.rotate(Math::angle(_previousPosition, currentPosition), axis.normalized());
    _previousPosition = currentPosition;

    redraw();
}
Compilation & running
Compilation is again nothing special:
find_package(Corrade REQUIRED Main)
find_package(Magnum REQUIRED
    GL
    MeshTools
    Shaders
    SceneGraph
    Trade
    Sdl2Application)

set_directory_properties(PROPERTIES CORRADE_USE_PEDANTIC_FLAGS ON)

add_executable(magnum-viewer WIN32 ViewerExample.cpp)
target_link_libraries(magnum-viewer PRIVATE
    Corrade::Main
    Magnum::Application
    Magnum::GL
    Magnum::Magnum
    Magnum::MeshTools
    Magnum::SceneGraph
    Magnum::Shaders
    Magnum::Trade)
Now, where to get the models and plugins to load them with? The core Magnum repository contains a very rudimentary OBJ file loader in ObjImporter, and you can try it with the scene.obj file bundled in the example repository. For more advanced models with custom textures and materials, Magnum Plugins provide TinyGltfImporter that can load the scene.glb, and there are more plugins for various other formats.
You can experiment by loading scenes of varying complexity and formats, adding light and camera property import or supporting more than just diffuse Phong materials. The full file content is linked below. Full source code is also available in the magnum-examples GitHub repository.
The ports branch contains additional patches for Emscripten and Android support that aren't present in master in order to keep the example code as simple as possible.
Credits
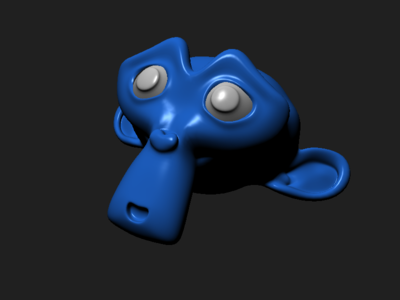
The bundled model is Blender Suzanne. Android port was contributed by Patrick Werner.